
ASP .Net 5 is a big change in the way developers create applications, many APIs are new, many others are still not compatible so it forces developers to look for workarounds on their traditional implementations.
There has been a lot of discussion about integrating Reporting Services with MVC 6.
The traditional approach to generate reports using Reporting Services is to use the Report Execution Service which comes as part of SSRS(SQL Server Reporting Services), in a traditional ASP .NET application you just create a reference to the web service and you get a generated proxy client, which you can use to generate reports through code.
In ASP .NET 5 you don't get the "Add Web Reference" nor "Add Service Reference" menu items, if you try to add a reference to another project which is not a package type project you get an error message.

One way to overcome this kind of issues is to use an Azure WebJobs and Queues.
First we create a storage account, in this case I named it "ptireportsstg".

Then, on a MVC Controller that will generate reports I connect to the Storage Account and to a queue named "reportsrequestqueue", if the queue does not exist, I create it.

Then in the View of the Report I want to generate I set the parameters and proceed to create the report generation request.

Then the post action starts executing and it has the passed model filled with the parameters set before in the form.
This action creates a CloudQueueMessage based on the model received.

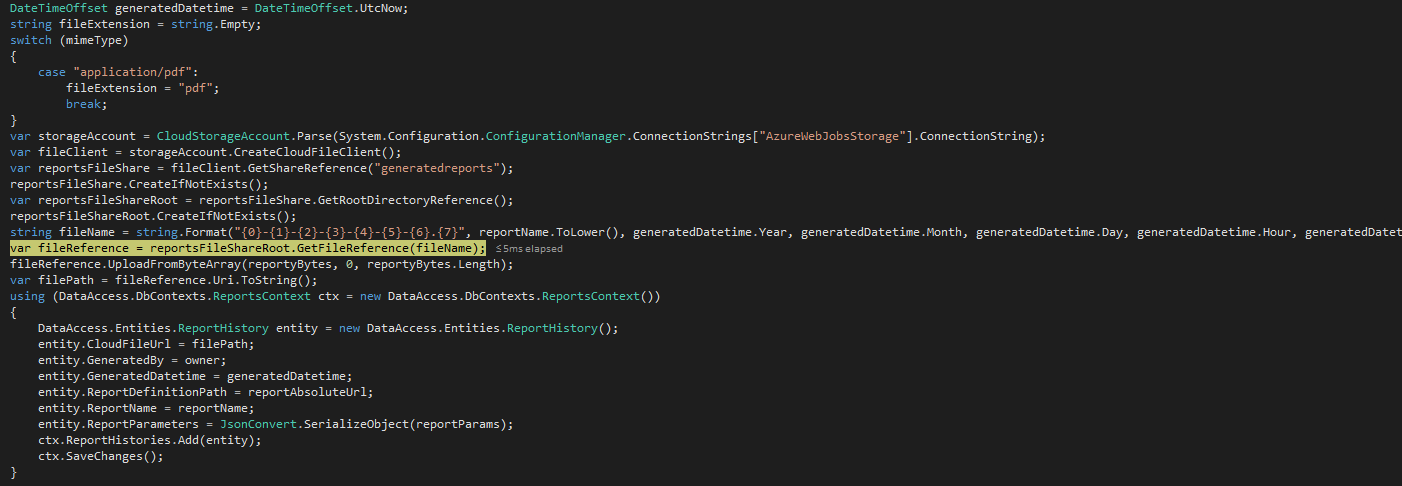
Once the WebJob received the cloud message it starts processing it.

The LoadReport method is the common implementation which generated the report's bytes so we are not showing it, once we have all that we proceed to save information about the generated report and to persist the report as an Azure Cloud File.

We save the generated report info along with its cloud file url in a table named ReportHistory.

Once we have that we can go to the list of reports, which read the information from the database.

Now we click on Download Report and it will proceed to read the Cloud File and download it.
We open the file and we have the expected contents.

Do you know of other solutions? Please feel free to share them in the comments and don't forget to

Then, on a MVC Controller that will generate reports I connect to the Storage Account and to a queue named "reportsrequestqueue", if the queue does not exist, I create it.

Then in the View of the Report I want to generate I set the parameters and proceed to create the report generation request.
Then the post action starts executing and it has the passed model filled with the parameters set before in the form.
This action creates a CloudQueueMessage based on the model received.

Once the WebJob received the cloud message it starts processing it.

The LoadReport method is the common implementation which generated the report's bytes so we are not showing it, once we have all that we proceed to save information about the generated report and to persist the report as an Azure Cloud File.
We save the generated report info along with its cloud file url in a table named ReportHistory.
Once we have that we can go to the list of reports, which read the information from the database.

Now we click on Download Report and it will proceed to read the Cloud File and download it.

We open the file and we have the expected contents.

Do you know of other solutions? Please feel free to share them in the comments and don't forget to
No hay comentarios.:
Publicar un comentario
Nota: sólo los miembros de este blog pueden publicar comentarios.